How to Change Filters in Your Undersink System
Undersink Filter Change Instructions
Changing & Flushing your New Filters
Tools needed:
- Bucket
- Spare piece of tubing with an elbow fitting on one end (included with your filter order)
Changing the filters:
In most situations when changing the filters, you will only need to disconnect the fittings from the filters, not the fittings from the tubing.
When removing each of the old filters, it may be helpful to remove the top fitting of the filter first (disregard fitting color for this) and put your finger on the filter hole while removing the bottom fitting. This keeps the water that is in the filter from spilling all over the place while you are getting the old filter into the bucket or sink to drain the water out before disposing.
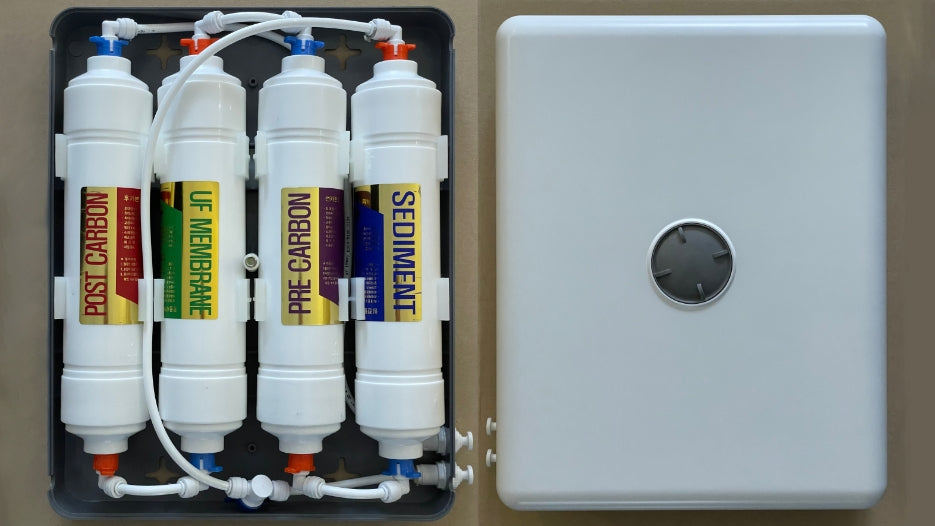
Notice that the replacement filters have an arrow designating the direction of water flow. Note the color coded blue and orange no-tool elbow fittings, the orange ones go on the inlet end of the filter and the blue fittings on the outlet end. Replace each filter making sure the arrow is pointing toward the blue fitting. You will notice the filter arrows will alternate pointing up and down when installed.
(One way to remember which color fitting goes on which end of the filter: Blue water is typically associated with fresh and clean so the "clean" filtered water comes out of the blue end of the filter. Orange water is the "unclean" water so the water from the orange side is going into the filter to be cleaned).
It is easiest to remove one filter at a time and swap it out with its corresponding replacement filter rather than removing all of the filters at once. It makes it much more manageable to keep track of where the filters go and which direction they go in.
Flushing the Filters:
Once you have your new filters installed, you can flush the Sediment and Pre Carbon filters at the same time and then flush all four filters together.
1. Turn on the filtered water faucet at the sink and allow the water to run. Leave it on for the next steps. This releases the pressure from the system so the fittings can be removed easily.
2. Remove the cover of the Undersink System and turn the blue-handled shut-off valve 1/4 turn clockwise. This will turn the water off.
3. Remove the Sediment Filter and replace with the new filter. Do the same with the rest of the filters.
4. Remove the blue elbow fitting from the outlet end of the Pre Carbon filter. (The end that the arrow on the filter is pointing toward)
5. Attach the spare piece of tubing that came with your new set of filters to the outlet (blue end) of the Pre Carbon filter.
6. Turn the water on and allow the water to flow through the Sediment and Pre Carbon filters into a bucket. If the water comes out black at first, this is completely normal - it is just loose carbon particles. Flush a couple gallons of water into your bucket.
9. Now, flush all 4 filters together by attaching the spare tubing to the outlet end of the Post Carbon filter.
10. Turn the water on and flush another couple gallons of water into your bucket.